Adding creativity to your wildflower photos
This article appeared in Marco Polo Magazine, Summer, 1999)
Article and photographs by Karen G. Schulman
I have always loved flowers...who doesn’t? As a child, I watched my father (who was both an avid gardener and amateur photographer) take some cuttings from our backyard garden and set them up by a sunny window. I was his assistant for "still life" images. We would arrange and re-arrange the blooms until they were just right, and then he would set up his tripod and take many shots of the same bunch.
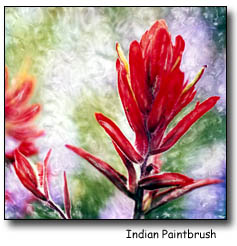
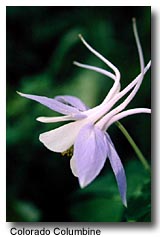
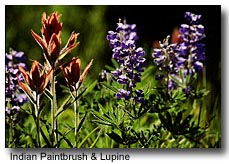
Here in northwest Colorado, I am surrounded by the marvels of nature, which peak in the summertime. Wildflowers of all colors and shapes bloom in the valleys and on the mountainsides from late May until September. It’s the perfect time to find the sparkle of early morning dew on tiny petals of a Rose Geranium or Indian Paintbrush. I am in "Zen flower land." It’s the same sensation I feel when scuba diving and photographing the wonders beneath the sea.
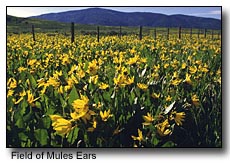
Wherever your travels take you this summer, there’s a pretty good chance that you will find lush displays of regional wildflowers, whether they are the popsicle-colored Iceplant growing along the sea cliffs of the western U.S. or the multihued fields of Rocky Mountain wildflowers.
To get beyond postcard images, you’ll need a few "tools" which will depend on the type of images you wish to make.
- 35mm SLR with extra batteries!
- Let’s assume you will be using color slide or negative film, slow (50 ASA) to medium (100-200 ASA) speed. The slower the film, the finer the grain, which translates into beautiful enlargements. The down side to slower film is slower shutter speeds when using small apertures. But it’s a small price to pay.
- Wide-angle lens (20 - 28mm) for great depth of field.
- Macro (micro) lens. True macro lenses are very sharp and may allow depth of field settings down to f-32.
- Or zoom lens incorporating macro. However, most macro zooms won’t allow you to get as close as a true macro lens.
- Close-up filters if you don’t have a macro lens. I have seen some beautiful photos made using these.
- Small reflector (white shirt cardboard works too).
- Sturdy tripod.
- Small camp chair (kneeling becomes tiresome).
- Spray water bottle.
- Insect repellent (you’re in their territory now).
- Snacks and water for yourself. You may be out there for a while.
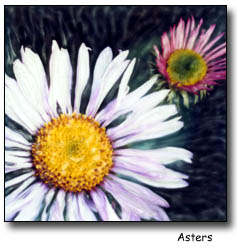
Get comfortable. (Is this possible?) Keep your compositions and backgrounds simple. The colors and shapes behind the main subject will form the "pattern" on your "canvas." Resist the temptation to put the subject...i.e. flower, right in the center of the frame.
Though most of us think of macro as the lens for close-up flower photography, your wide angle lens can be a very creative tool. Getting in close and aiming upwards, your lens will be filled with flowers and patches of sky/clouds. Look for interesting combinations of flowers or a one specimen grouping. Any time of day is appropriate. (Be sure to follow the suggestions for backgrounds and keep in mind that you will have lots of depth of field.)
Because very light, dark or bright colors can fool the camera’s meter, bracket your exposures by keeping either the shutter speed or aperture constant and changing the other to let in more or less light. You can also do this with an exposure compensation dial if one is available.
Play around with lots of exposures at different aperture/shutter combinations and angles of view. Write them down. Allow yourself to use plenty of film. You can choose your favorites when the photos return from the lab. Most of all, be patient, have fun and share your unique vision!
*To learn more about nature and wildflower photography, check out Focus Adventures’ summer workshops.